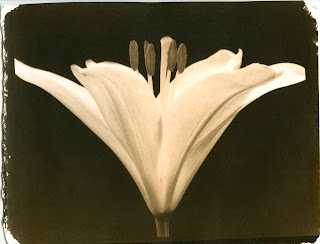
Last night was such an example. I decided to give selenium toning a try with the kallitype prints I made last week. I was expecting to just mix a batch of it and get an idea for how long it takes to tone to a more neutral shade. Instead, I watched in horror as my first print instantly turned a brilliant shade of "poo".
 |
| Selenium toned at 1+9 |
Ravage might not be the proper term because by the time all was said and done I ended up with a final print that looks like it was handcrafted from chocolate milk. The actually print looks much nicer than the scan. The gradation of tones is fantastic and the bleaching effect gave it an extremely soft quality.
 |
| How the print looked seconds before toning |
The small victory is that now I know how to make a very brown print should the need arise.
 |
| Selenium toned at 1+100 |
Thankfully the print didn't instantly turn to poo-chocolate. At first there wasn't much change. I took my eyes off it for a few seconds and when I glanced back it was already making a run for brown. In less than a minute the highlights had bleached more than I wanted and the shadows were losing density so I yanked it from the toner before another semi-catastrophe.
 |
| The same print, un-toned. |
I'm not a big fan of what happened with the deepest blacks of the original. It's a less than flattering brownish tone. I don't like how much it bleached the highlights and softened the finer details. The one redeeming point is it separated the tones in the shadows and the darker mids.
 |
| Selenium Toned at 1+200 |
With only one sacrificial print left to work on I was getting a little nervous. I didn't bother mixing another batch of toner. Instead I just dumped another liter of water in to make a dilution of 1+200.
I'm happy with the results of this. It toned in under two minutes and gave the neutral-ish tones I was looking for. The deep blacks went slightly cooler and the mids and highs shed their brown qualities.
 |
| Original print without toning. |
Here's the process that worked the best:
Selenium Toning:
I started with prints that had been previously fixed, washed and dried. I soaked the prints for 10 minutes in a water bath. The prints were then placed in Ilford Selenium Toner diluted 1+200. The prints reached the tone I was looking for somewhere between 60 and 90 seconds. After reaching the desired tone, I moved the prints to a bath of Kodak Hypo Clear at standard working strength (1+4 from stock) for about 3 minutes. The prints were then rinsed for about 15 minutes and hung to dry.
Ah-ha! It's the bleach, bro.
ReplyDeleteLast year, I was playing around with some enlarged gelatin-silver prints on Ilford FB. I planned to selenium-tone the prints, but in one, I needed to use bleach. In that one bleached print, the selenium reacted with the bleach and turned the print poopy brown.
Sorry to say that I don't remember my selenium dilution, agitation, or duration...